How to claim Bitcoin Cash from Bitcoin Core to an SPV wallet

If you held Bitcoin (BTC) in a Bitcoin Core software wallet before the Bitcoin blockchain fork on August 1, 2017, you now also possess an equal quantity of Bitcoin Cash (BCH). In this post, we will show you how to claim it.
There are numerous ways to claim Bitcoin Cash from a Bitcoin Core wallet. In this tutorial, we will demonstrate how to retrieve a private key for a Bitcoin Core wallet address. Then we will show you how to use the private key to claim Bitcoin Cash using the Electron Cash wallet on Windows 10. Electron Cash is a lightweight SPV (Simplified Payment Verification) wallet. It does not download the blockchain or run a full node.
If you want to claim Bitcoin Cash from Bitcoin Core, but want to run a full node Bitcoin Cash wallet, please see How to claim Bitcoin Cash from Bitcoin Core to a full node wallet.
Step 1. Important: Backup your Bitcoin Core wallet (wallet.dat file)

Do not skip this step. Under the File menu, click Backup Wallet. Save the wallet.dat file to a location or device other than where you have installed Bitcoin Core. The wallet.dat file contains your Bitcoin private keys.
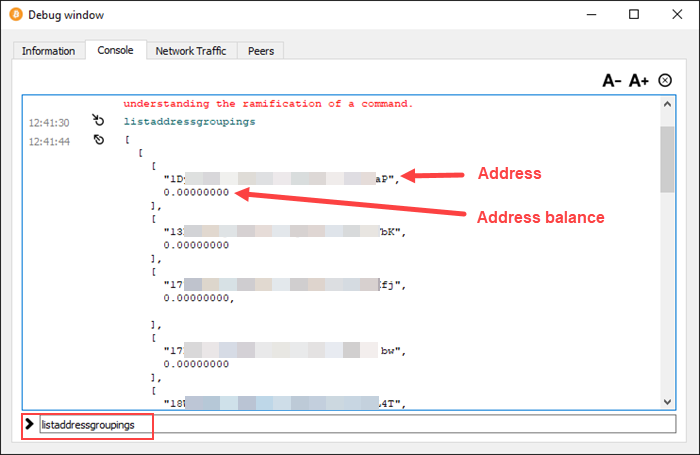
Step 2. Find BTC addresses that have balances

Under the Help menu, click Debug window. In the Debug Window, click the Console tab. Type listaddressgroupings into the command input field, and press the Enter key on your keyboard. After a few seconds, a list of your public wallet addresses will display in the Console. Review the list for addresses that have balances.
Step 3. Unlock your Bitcoin Core wallet

Remain in the Debug window’s Console tab. If you encrypted your wallet with a passphrase, you must unlock the wallet to retrieve a private key. To unlock the wallet, type the following command and press Enter:
walletpassphrase your-pass-phrase-here seconds-to-unlock
For example, if your passphrase is “mypassphrase” and you want to unlock your wallet for 5 minutes (300 seconds) while you embark upon this process, the command would be:
walletpassphrase mypassphrase 300
After 300 seconds, your wallet will automatically re-lock.
Step 4. Retrieve the private key for each public address with a balance
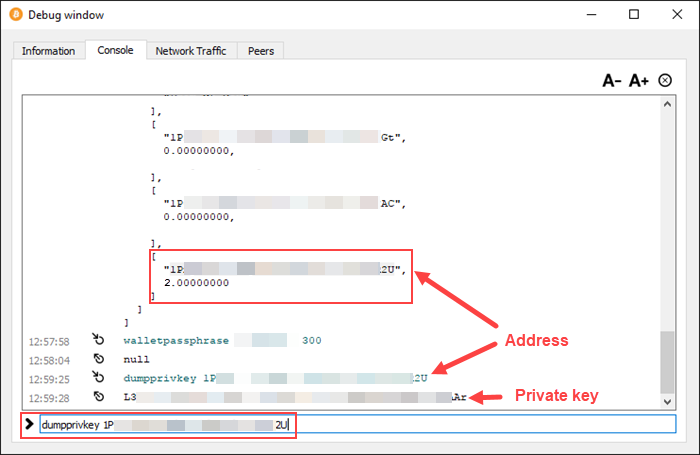
Remain in the Debug window’s Console tab. While you have unlocked your Bitcoin Core wallet, type the following command and press Enter:
dumpprivkey your-bitcoin-address
The private key for your Bitcoin address will display in the Console.
Step 5. Download and install the Electron Cash software wallet

Visit the Electron Cash website. You can verify the website’s link by visiting the official BitcoinCash.org website and following the Electron Cash link under Wallets. It is always worth the extra due diligence to avoid scam websites.
Click the Download button. Electron Cash is available for Windows, OSX, Linux, and Android. Click the link for your preferred download. For this tutorial, we downloaded electron-cash-2.9.3.exe to the desktop of a Windows 10 64-bit computer.
Double-click electron-cash-2.9.3.exe to launch the Electron Cash wallet installer. An install wizard launches to guide you through the installation process.
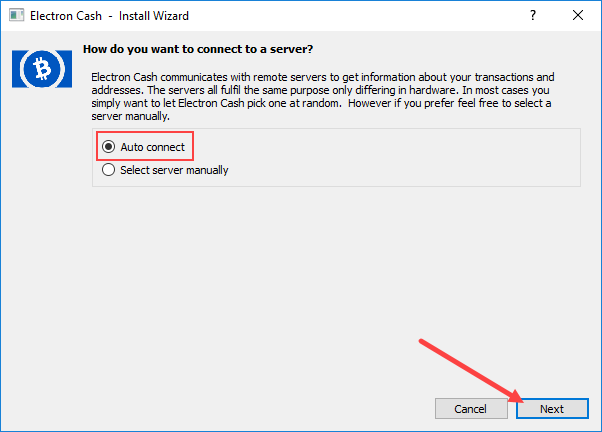
Panel 1. How do you want to connect to a server? Choose Auto connect and click Next.
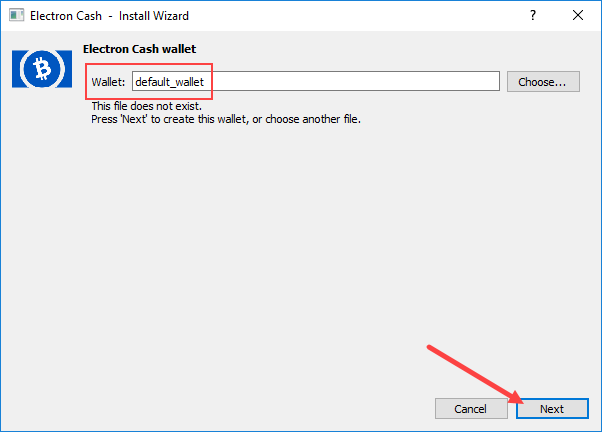
Panel 2. Electron Cash wallet. Retain default_wallet and click Next.
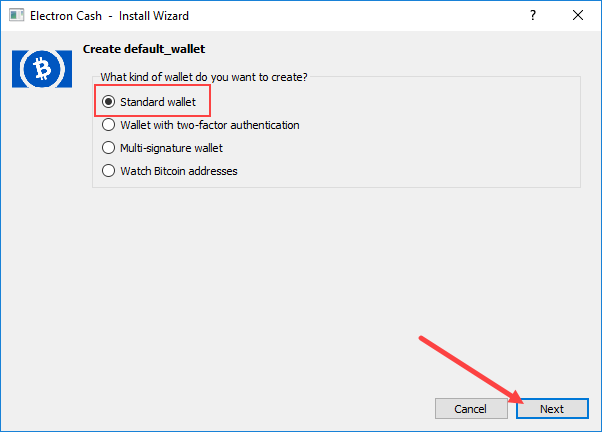
Panel 3. Create default_wallet. Choose Standard wallet and click Next.
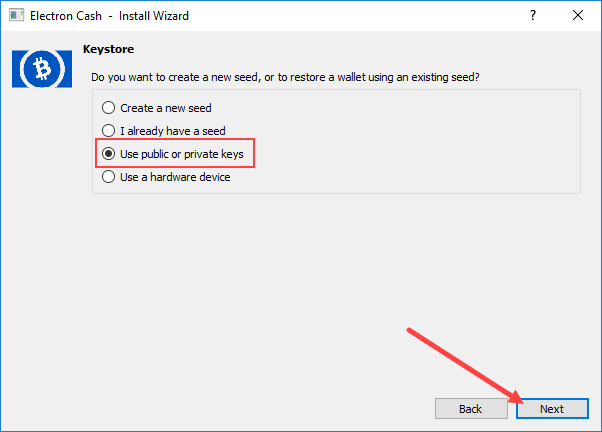
Panel 4. Keystore. Choose Use public or private keys and click Next.
Panel 5. Create keystore from keys. For each of your Bitcoin public addresses that have a balance, copy the private key from the Bitcoin Core debug window console. Paste each private key into the keystore input field on a new line. Click Next to continue.

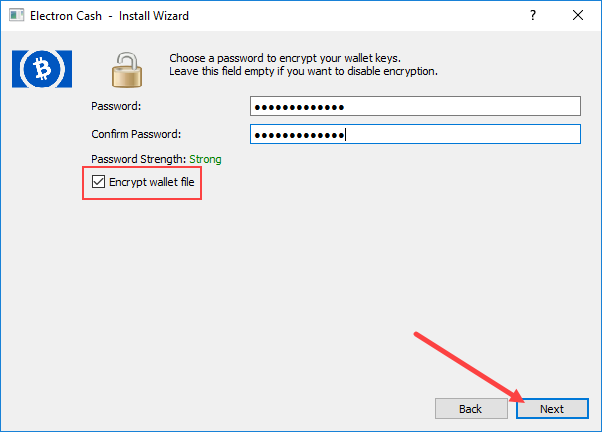
Panel 6. Encrypt your Electron Cash wallet with a password, and click Next.
Step 6. Electron Cash wallet launches

Electron Cash wallet launches automatically once encrypted. You should see the same pre-fork number of Bitcoin Cash (BCH) coins in your Electron Cash wallet that you see in your Bitcoin Core (BTC) wallet.
Remember that Electron Cash is a Bitcoin Cash (BCH) wallet only. Do not send BTC to a BCH wallet, and do not send BCH to a BTC wallet. Although they share the same namesake and pre-fork history, the networks are separate.
Step 7. Post-Claim Tasks

A. Make sure your Electron Cash wallet works as you expect. Start by sending and receiving small trial BCH transactions. Wait for confirmations to accrue before proceeding with larger transaction amounts.
B. The Electron Cash wallet is new software with a small user base and a brief history. Your Bitcoin Core (BTC) private keys are now in use with a fledgling Electron Cash software wallet. As a precaution, consider sending the BTC in your Bitcoin Core wallet to another BTC wallet. This will protect your BTC with a different private key apart from your BCH.
C. Use the Blockchair website to explore your transactions on the Bitcoin Cash (BCH) blockchain. Copy a public wallet address used to claim BCH, and paste it into the Blockchair search box. Or you may append a public wallet address to the following link: https://blockchair.com/bitcoin-cash/address/your-BCH-address-here
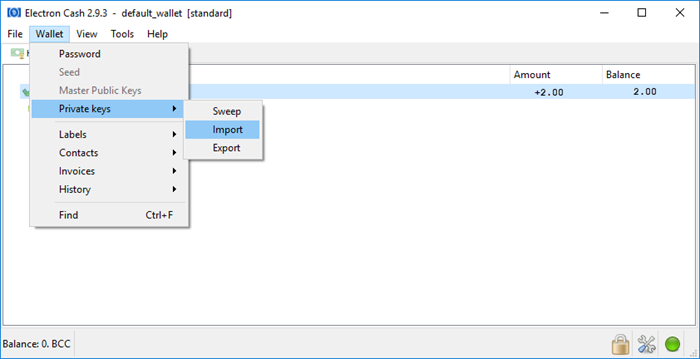
D. Import additional private keys if needed. Click Wallet > Private keys > Import. Paste each private key into the Enter private keys input field on a new line. Click Import to continue.
And that’s it. You should now have access to your post-fork BCH to do with as you please.
